Need to adjust something on your Mac, but it's all the way on the other side of the house? You don't need to get off the couch: your Mac's built-in screen sharing works great with your iPhone or iPad, and it's a snap to set up.
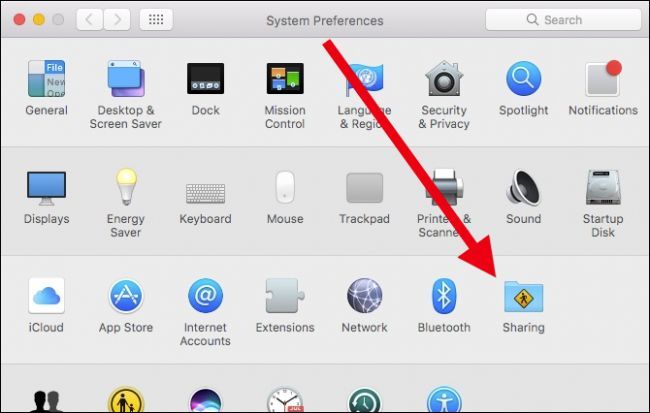
To get started, you need to first enable screen sharing on your Mac. To do this, first open the System Preferences, then click Sharing.
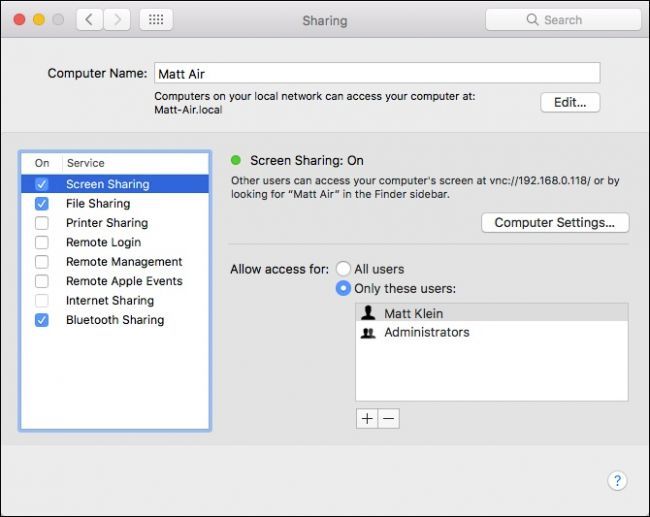
With the Sharing preferences open, check the box next to the Screen Sharing service. With the service now enabled, you can limit access to certain users or open it up for anyone, though they won't be able to actually log in to your Mac without a user account.
If you want to add a user to access your Mac, click the the "+" symbol at the bottom of the user list. To remove a user, click the "-".
Make sure to take note of the IP address under where it says "Screen Sharing: On". In our case, our Mac's IP is 192.168.0.118.
If you click on the "Edit" button, you'll be able to set a password so that VNC viewers can control the screen, otherwise they'll only be able to view its contents.
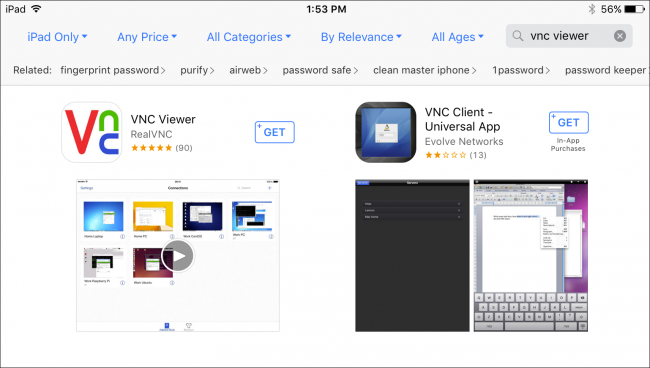
That's the only configuration you need to worry about on the Mac side of things. Now you need to download a VNC client on your iOS device. The best one by far, in our opinion, is VNC Viewer, which is free and easy to set up.
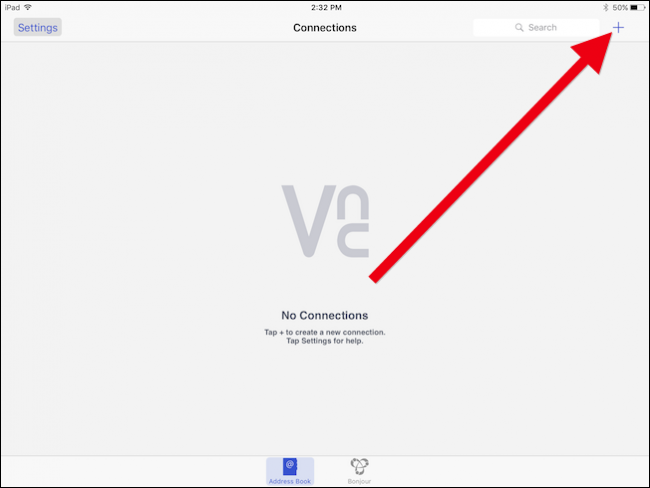
Once you've installed VNC Viewer, click the "+" in the upper-right corner of the screen to set up a new connection.
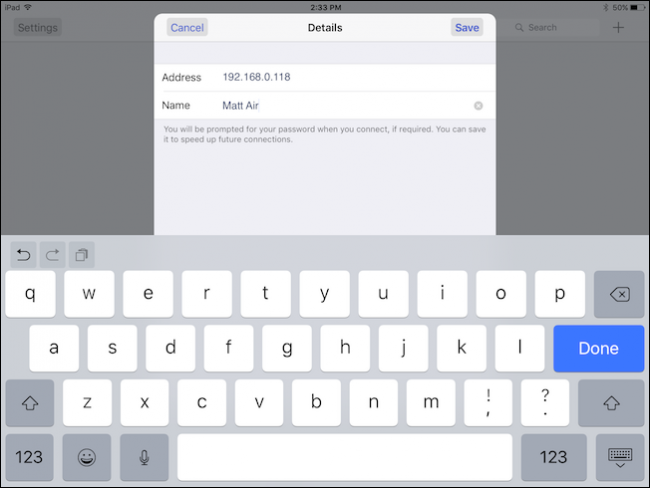
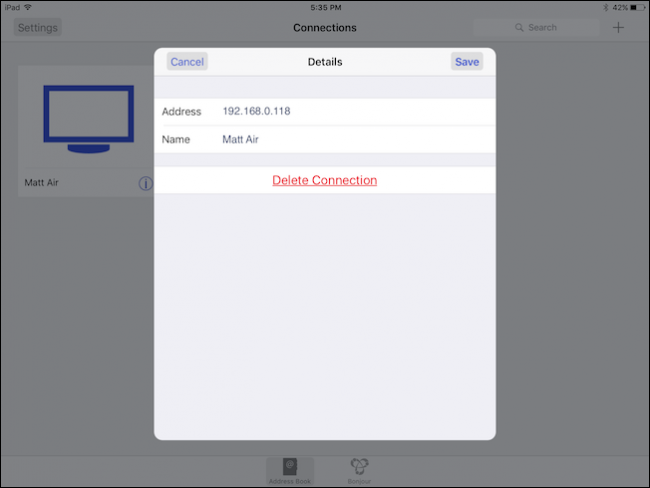
Remember our Mac's IP? You want to enter that number in the Address field. We named our connection that same as the name of the computer, but you can give your connection any name you want.
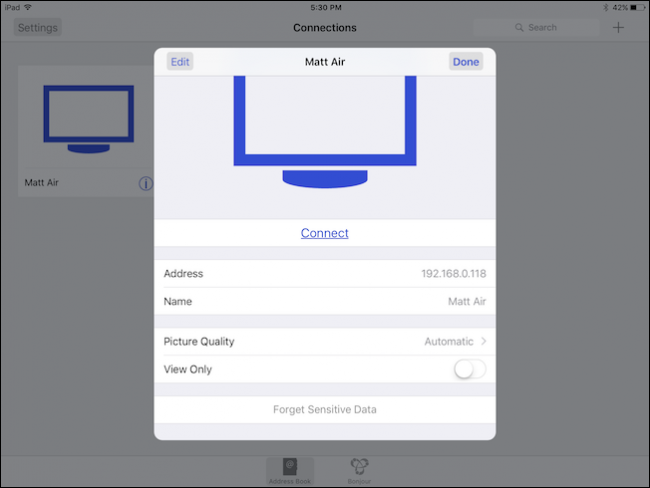
With your new connection created, tap on the "i" symbol to make sure everything looks good.
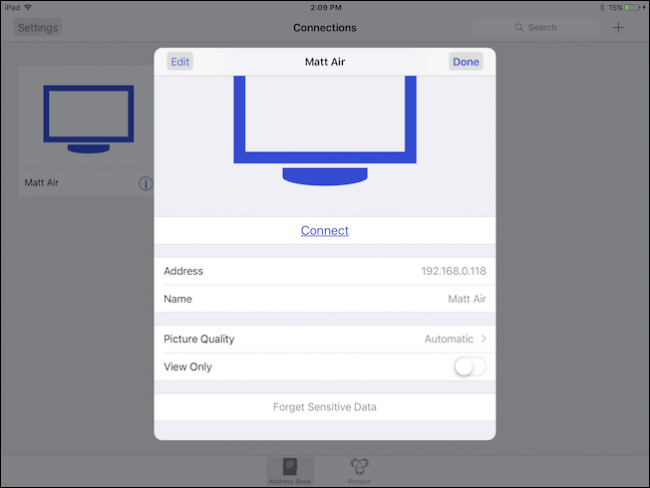
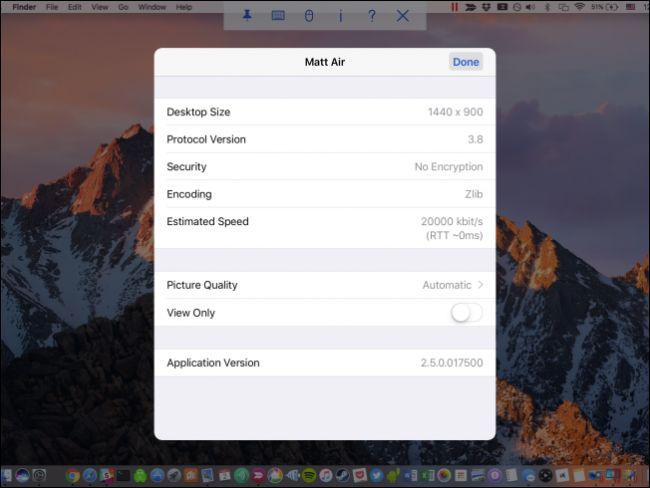
There are options here to adjust the picture quality depending on your connection's speed, and to force it into "View Only" mode. If you want to clear the connection's password, tap "Forget Sensitive Data".
There's also an "Edit" button in the upper-left corner of the connection's settings. Editing your connection let's you change the address, name, and delete it entirely.
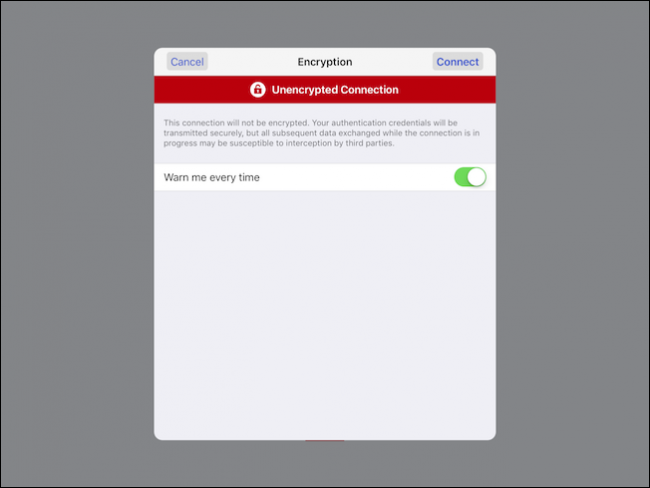
To actually connect to your Mac, tap the connection in the VNC Viewer screen. You'll be warned that your connection is unencrypted, and you'll have the option to be warned every time you connect. Go ahead and tap "Connect" to get started.
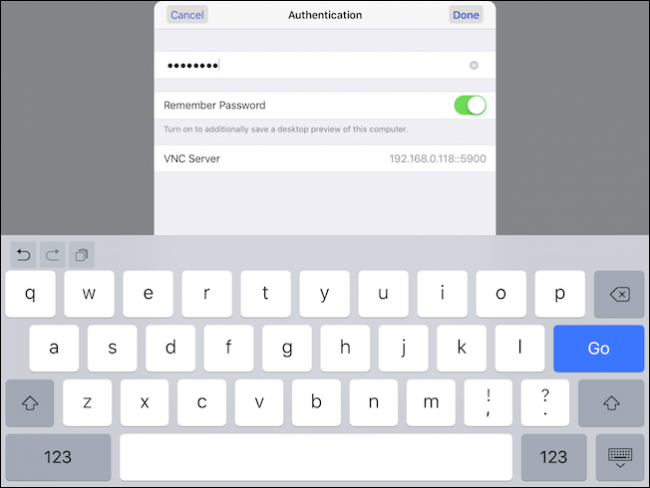
Remember when you set up a password on your Mac? Now is when you enter that. If you want to remember this password, tap the option to do so.
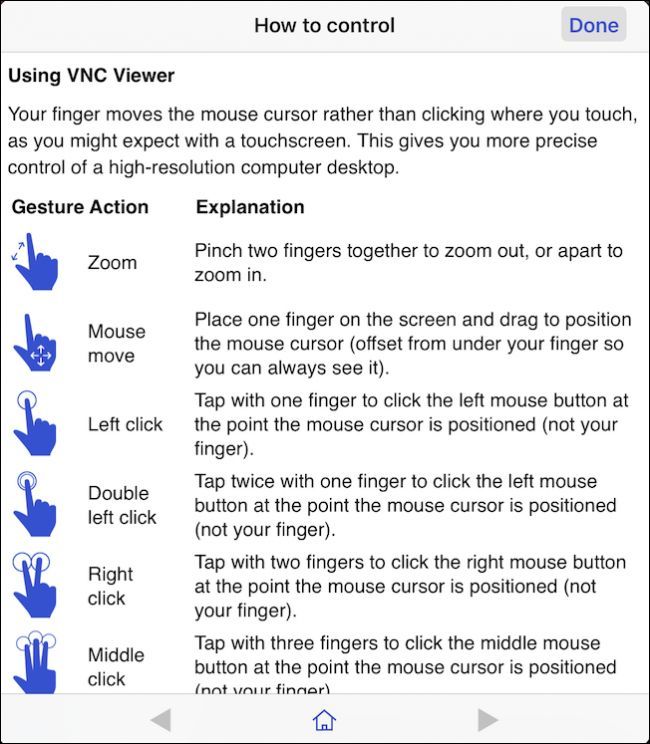
Upon first establishing a connection, you'll be shown a handy cheat sheet of gestures you can use to interact with your Mac's desktop. You can access this at any time by tapping the control bar at the top of the screen, which we'll point out shortly.
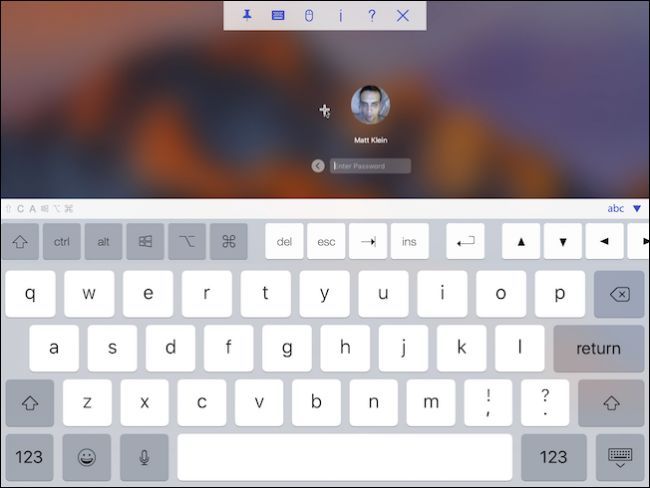
Here is our login for our Mac. As we said earlier, the only way to actually access this computer is to have an account. You'll need to press on the mouse pointer and drag it to the text box to enter your password. To actually type in your password, tap the keyboard icon on the control bar along the top of the screen.
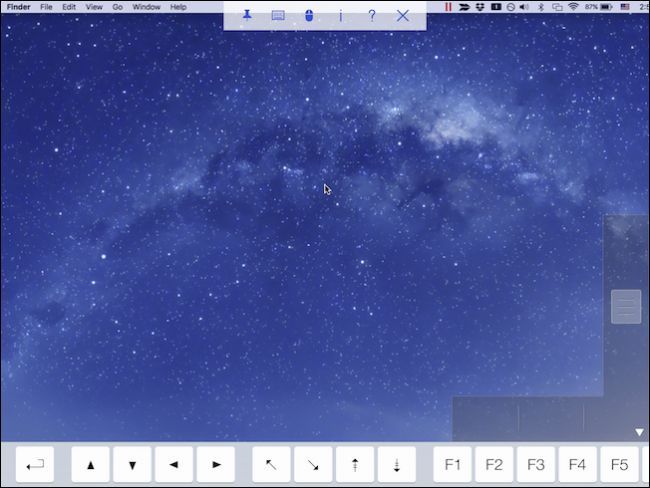
Now that you're logged into your Mac, let's have a look at that control bar. From left to right, you can pin or unpin this feature, show or hide the keyboard, and access the mouse controls.
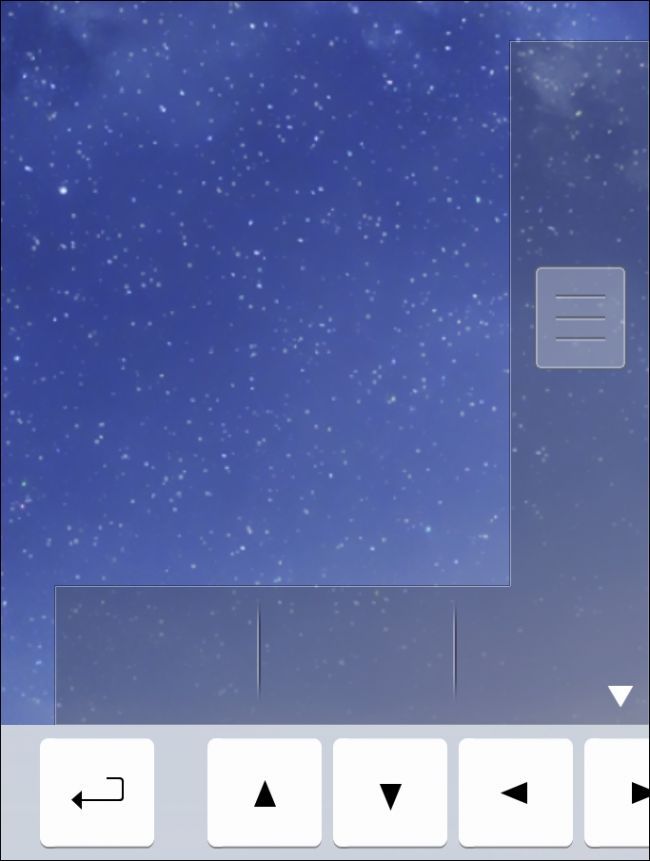
These are the mouse controls. It is basically the upper row of the keyboard controls, plus a special mouse feature in the lower-right corner.
The way this works is very simple. The horizontal bottom part is separated into three separate parts which represent left, middle, and right clicks. The vertical slider to the right lets you scroll through documents and webpages.
Rounding out the buttons on the control bar, the question mark icon will display the help screen we showed you earlier, and the "X" will disconnect the session. Tapping the "i" icon will show information on your connection. From there, you will also be able to change the picture quality should your connection prove too slow, and you can also convert the session to view only.
Note, that while another device is connected to your Mac, you can disconnect them by clicking the screen sharing icon in the menu bar and selecting the disconnect option from the dropdown menu.
That's it. Setting everything up is a snap and there's really only a tiny bit of configuration. What you use screen sharing for is completely up to you. Don't forget, you can also connect to your Mac's screen via VNC from your Windows computer as well.
Using your iPhone or iPad to control your Mac probably isn't going to feel like the most convenient method. It's really just intended to help you attend to small job and tasks remotely without needing to get up and walk over to the computer. So, next time you leave music playing on your Mac or have an application that you forgot to close, you can just grab your iPad and easily attend to it.

