There’s nothing worse than pulling an iPhone out of your pocket to capture that brief moment in life that will never repeat itself only to be met with a “storage almost full” message.
It’s a sinking feeling so no wonder that most folks tend to immediately remove older photos.
But there are better ways to free up storage space on your device that don’t necessarily involve deleting your precious memories. Faced with a low-storage prompt, your first order of business should be checking if apps you frequently use are gobbling up your storage by caching large amounts of data.
That’s just the starters, as there’re plenty of other space-saving techniques you should be employing on a regular basis. In this tutorial, you’ll learn how to manually flush app caches, disable certain iOS features and flip the switches you never knew existed in order to remove as much of the cruft clogging up your iOS device as possible.
About the cruft…
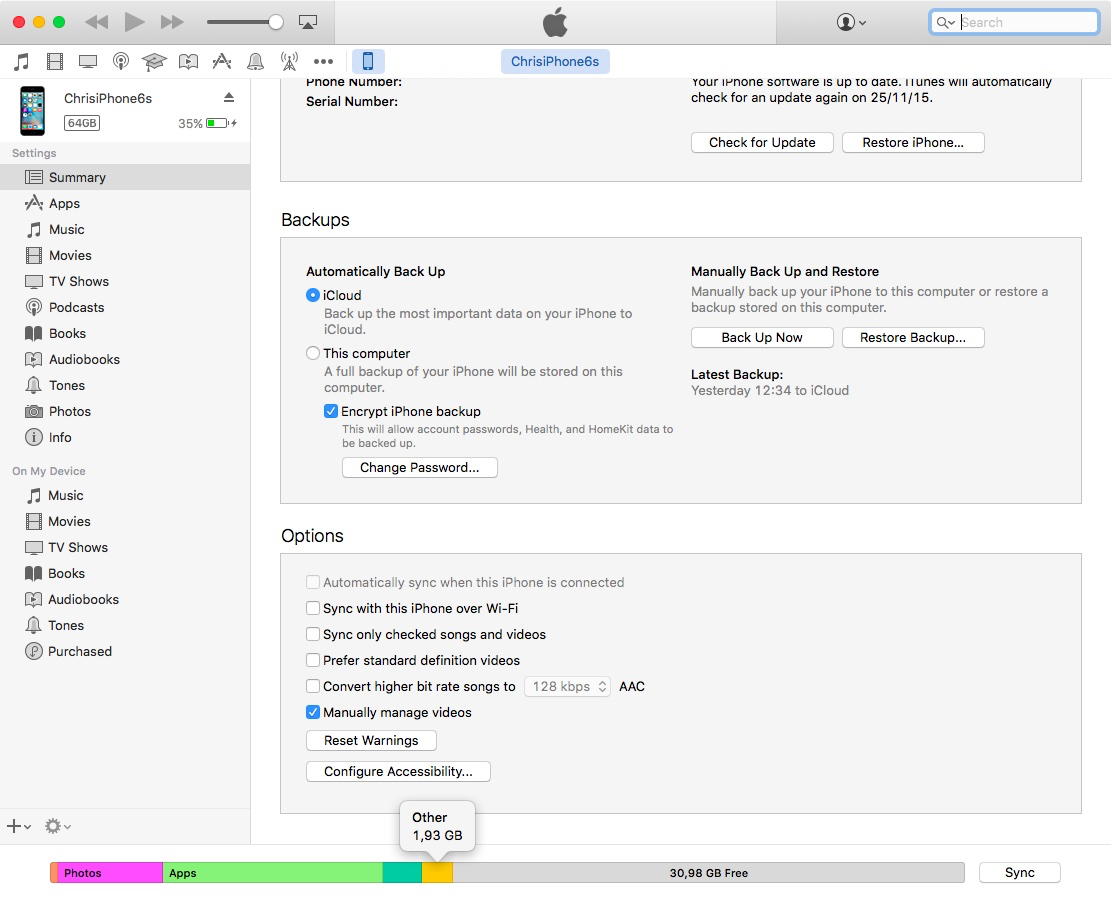
App caches along with temporary files, logs and other low-priority data all quickly add up to the Other storage section, as shown in iTunes.
For many people the Other storage quickly balloons to anywhere between a few hundred megabytes to a few gigabytes’ worth of storage that could be put to better use like downloading more apps, storing additional media on the device and more.
As evidenced by the screenshot below, the Other storage on my iPhone 6s is taking up nearly two gigabytes of storage and I’m barely a month into this new phone.
It’s important to keep in mind that clearing the cruft clogging up your iOS device is a temporary solution as they’re created over time by virtue of your app usage.
Method #1: do a force restart
Force-restarting an iOS device (also known as a cold reset) helps wipe out some of the temporary files and caches. To perform a force restart of your iOS device, press and hold the Sleep/Wake and Home buttons simultaneously until an Apple logo appears. I myself do this at least once per week just to be on the safe side. Force restarts also have the benefit of helping iOS run a little snappier.
Method #2: delete caches through Settings
Some apps give you controls to flush their caches through Settings. Because iOS doesn’t distinguish between apps that have these controls from those that don’t, you need to check this on a per-app basis.
Step 1: Launch Settings on your iOS device.
Step 2: Head over to the General → Storage & iCloud Usage section. Now tap Manage Storage under the heading Storage. You will see a list of apps installed on your device, sorted by how much local device storage each is taking up.
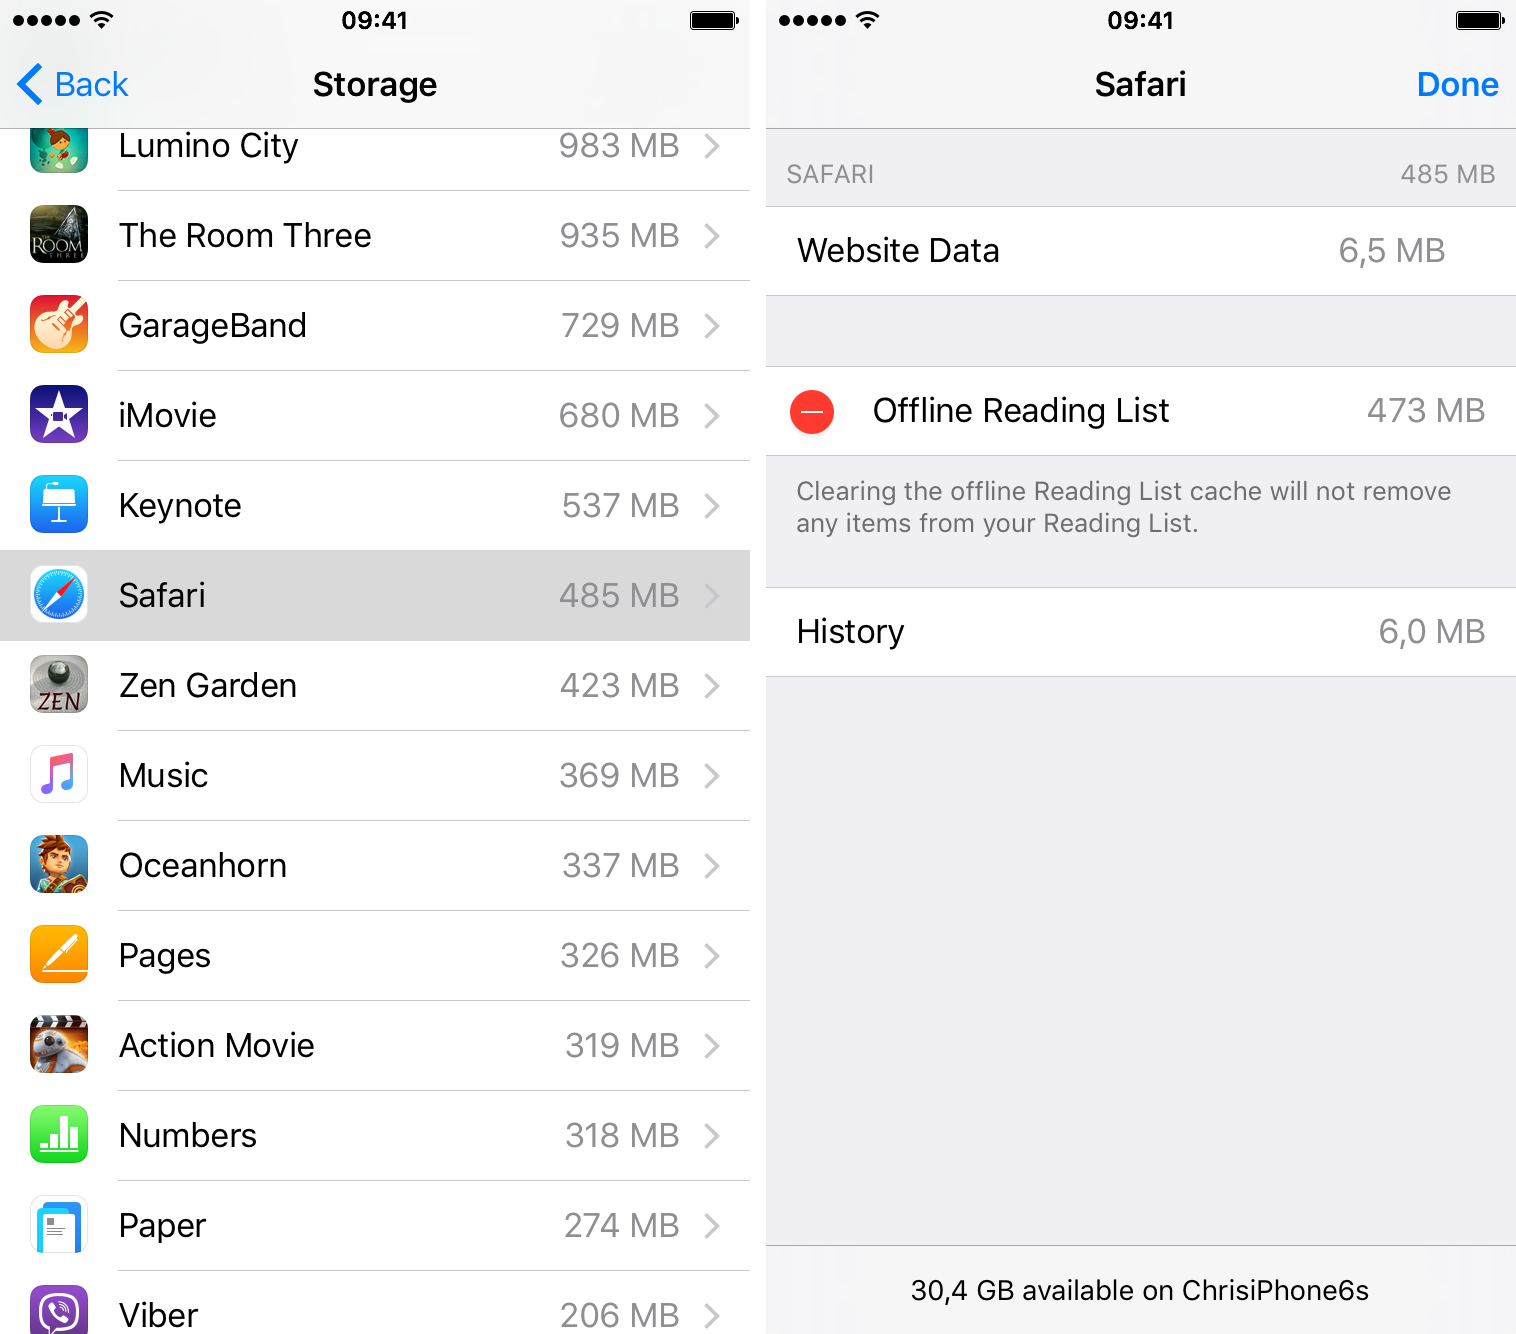
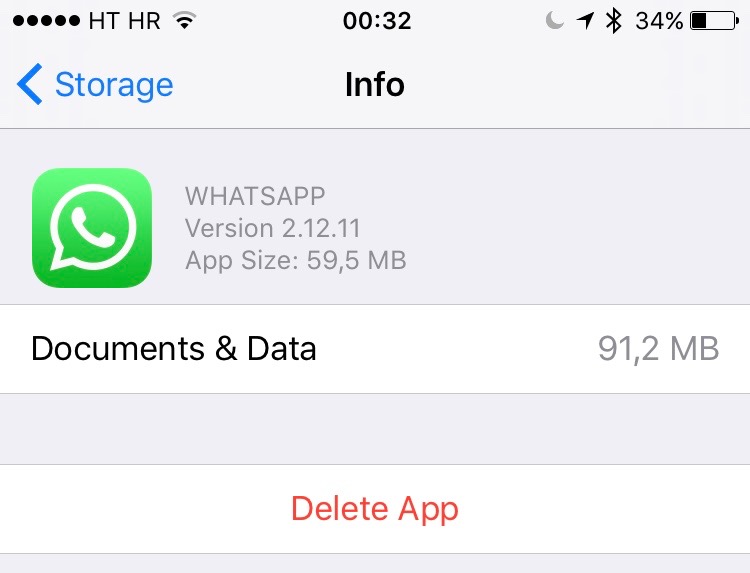
Step 3: Now drill into a specific app’s information to see how much storage its on-device data is taking up. I think I might want to remove cached webpages saved on my iPhone as part of Safari’s Reading List feature.
Step 4: Now slide unwanted items to the left and tap Delete, or tap Edit → Delete All to remove all the app’s data.
As the screenshot above attests, I was able to regain nearly half a gigabyte of storage space lost to Safari’s Reading List cache. Don’t worry, this will only remove cached items from your device, not the actual webpages in your Reading List.
RELATED: How to clear Safari’s Offline Reading List cache
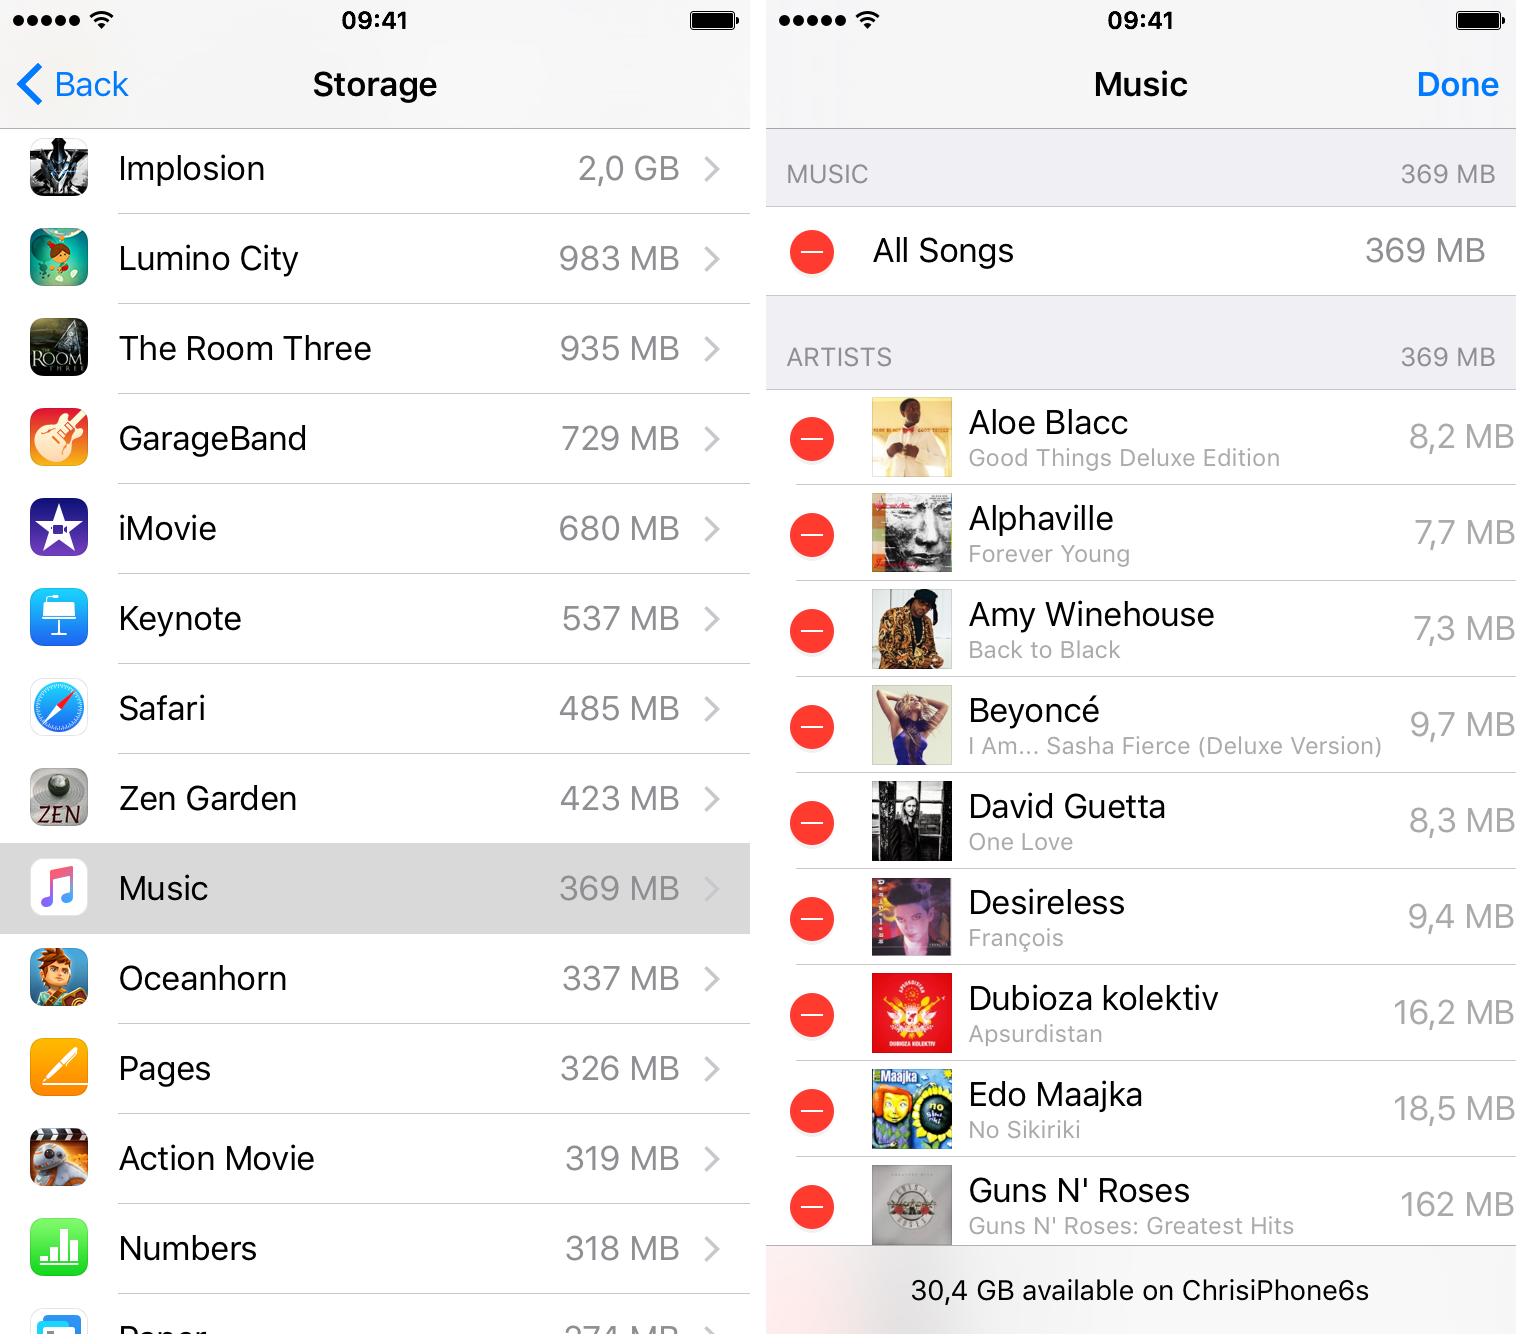
Some apps permit you to cherry-pick locally-stored documents that you wish to remove, including Apple’s stock Music, Videos and iBooks apps. In the case of the Music app, you can remove individual songs or whole albums that you have marked for offline listening on the same Settings screen.
RELATED: How to remove unwanted electronic books in iOS
Managing storage through Settings doesn’t just conveniently inform you how much data apps use but also provides an at-a-glance overview of all the apps on the device.
Method #3: delete caches from within apps
As mentioned, many apps lack cache-related controls in Settings and instead provide in-app controls. A good example is Tweetbot.
A quick trip to Settings and I realize that I’ve lost over a hundred megabytes of storage to Tweetbot’s cache alone. It’s not alarming but on the other hand every megabyte counts, especially when faced with iOS’s low storage warning.
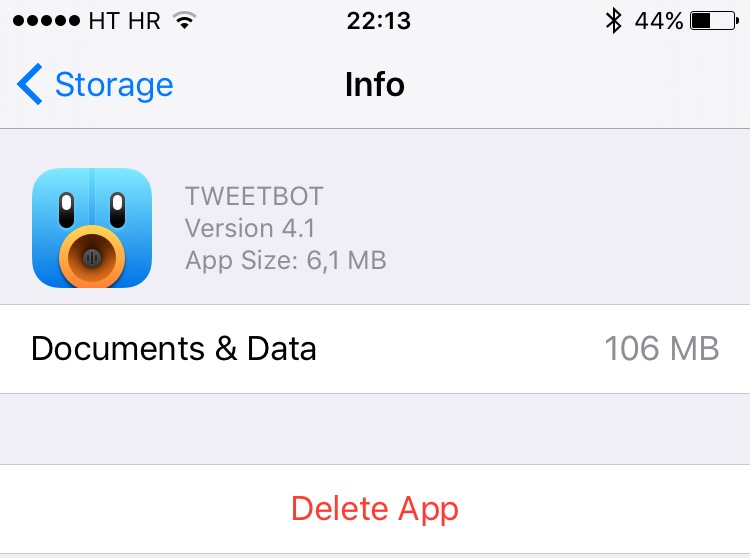
In the case of Tweetbot, I selected my personal account in the app’s settings interface and hit the red Resent Account Cache button at the bottom. Those who use multiple Twitter accounts with Tweetbot will need to repeat the process for each account.

Method #4: reinstall space-hogging apps
This is a 100 percent safe way to reclaim Other storage and ensure that no app-specific junk is left behind. Before you proceed, you’ll want to make sure that content you have created and stored within apps is backed up somewhere.
I typically use iOS’s multi-purpose Share menu to email content to myself or beam it wirelessly to my Mac with AirDrop, but your can upload your stuff to online storage services like Dropbox or OneDrive.
Step 1: Tap and hold an app icon’s on the Home screen so that icons start jiggling. Now hit the X symbol in the upper-left icon corner to remove the app in question.
Step 2: Open the App Store and visit the Purchased section, where you can redownload any previously installed app, free or paid.
To delete apps even faster, use the storage management interface of the Settings app to zoom in on major space-hogs. Then tap an app in the list and hit the red Delete App button at the bottom of the next screen.
In my own example, I was able to regain more than one gigabyte of storage just by deleting and reinstalling Tweetbot, Twitter, Facebook, Paper by Facebook, Facebook Messenger, WhatsApp, Viber, Skype and the Google app.
That’s excluding nearly half a gigabyte’s worth of Safari’s Reading List cache up, mind you. If I clear out Safari’s cache and proceed with additional space-saving techniques outlined further below, I might be able to regain almost all Other storage.
Method #5: start over
Yes, you read that right. If you cannot reclaim a meaningful amount of your precious ‘Other’ storage for whatever reason, starting anew by restoring your device gives you a completely clean slate and makes the device run faster.
Step 1: First, perform a full backup of an iOS device in iTunes (with encryption enabled) or through iCloud so you can revert to it later, if you want.
Step 2: Perform a full restore, which deletes everything on the device, by going to Settings → General → Reset → Erase All Content and Settings.
Step 3: Set up your device as new, reinstall the apps you need, adjust iOS and app settings and sync your media through iTunes or other methods (Dropbox).
Don’t restore your device from a backup. Although caches and temporary files apps mark for deletion are not backed up, starting from scratch is the best way to get rid of leftover files carried over from previous installations.
Method #6: use space-cleaning apps
In addition to manual storage management, you might want to try out dedicated iOS file managers and apps focused on removing junk files.
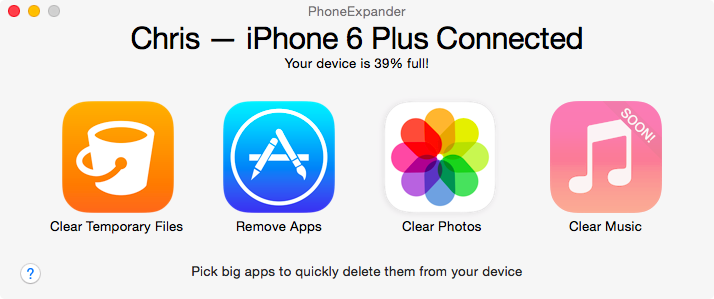
There are plenty of them out there (Google is your friend) so I’m going to single out PhoneExpander (pictured below), PhoneClean, iFunBox, iMazing and the upcoming Decipher Phone Cleaner by Decipher Tools, to name just a few.
DISCLAIMER: Uninformed use of these tools is highly discouraged. Apple prohibits users from accessing the iOS file system for a very good reason. Not really knowing what you’re doing can easily mess up your device.
If you’re jailbroken, there are even better ways of managing your storage such as Ryan Petrich’s useful cache-cleaning tool.
Method #7: be smart about iOS features
A range of other space-saving techniques are at your disposal, some of which can free up large chunks of storage occupied by iOS features.
For starters, disable Photo Stream ( Settings → Photos & Camera → My Photo Stream → Delete), turn off Keep Normal Photo in your Photos & Camera settings and clear out Safari’s cache (Settings → Safari → Clear History and Website Data).
Next, manually delete unwanted voice memos and voice mails, old podcast episodes, videos you’ve watched, books you’ve read, music you no longer enjoy, screenshots, photo duplicates and visually similar items in your Camera roll.
If I were you, I’d also consider doing the following:
- Remove custom dictionaries
- Turn off high-quality voices for VoiceOver
- Disable system languages you don’t use
- Restrict Background App Refresh to as few apps as possible
- Remove (and re-add) email accounts to free up storage lost to attachments
- In Messages settings, elect to never store photo and video attachments
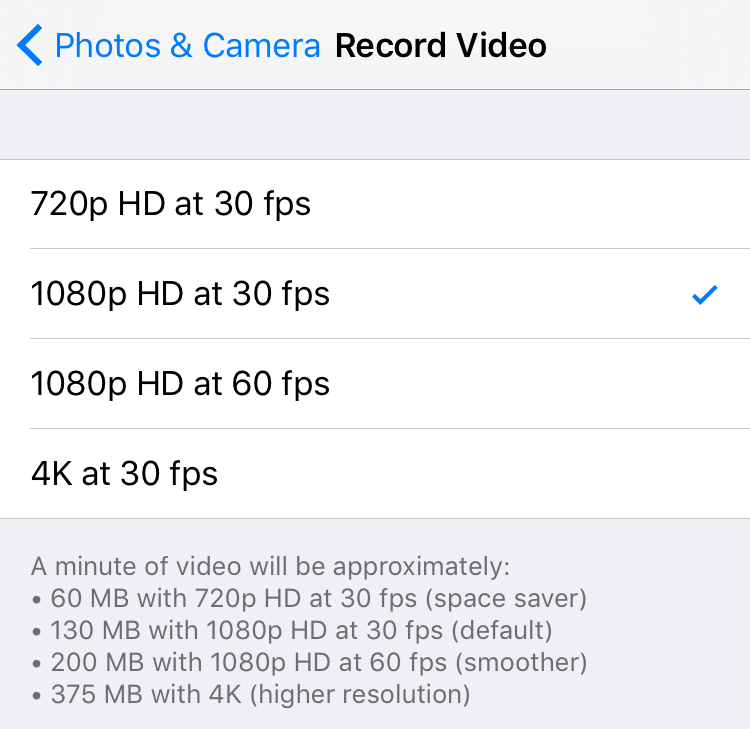
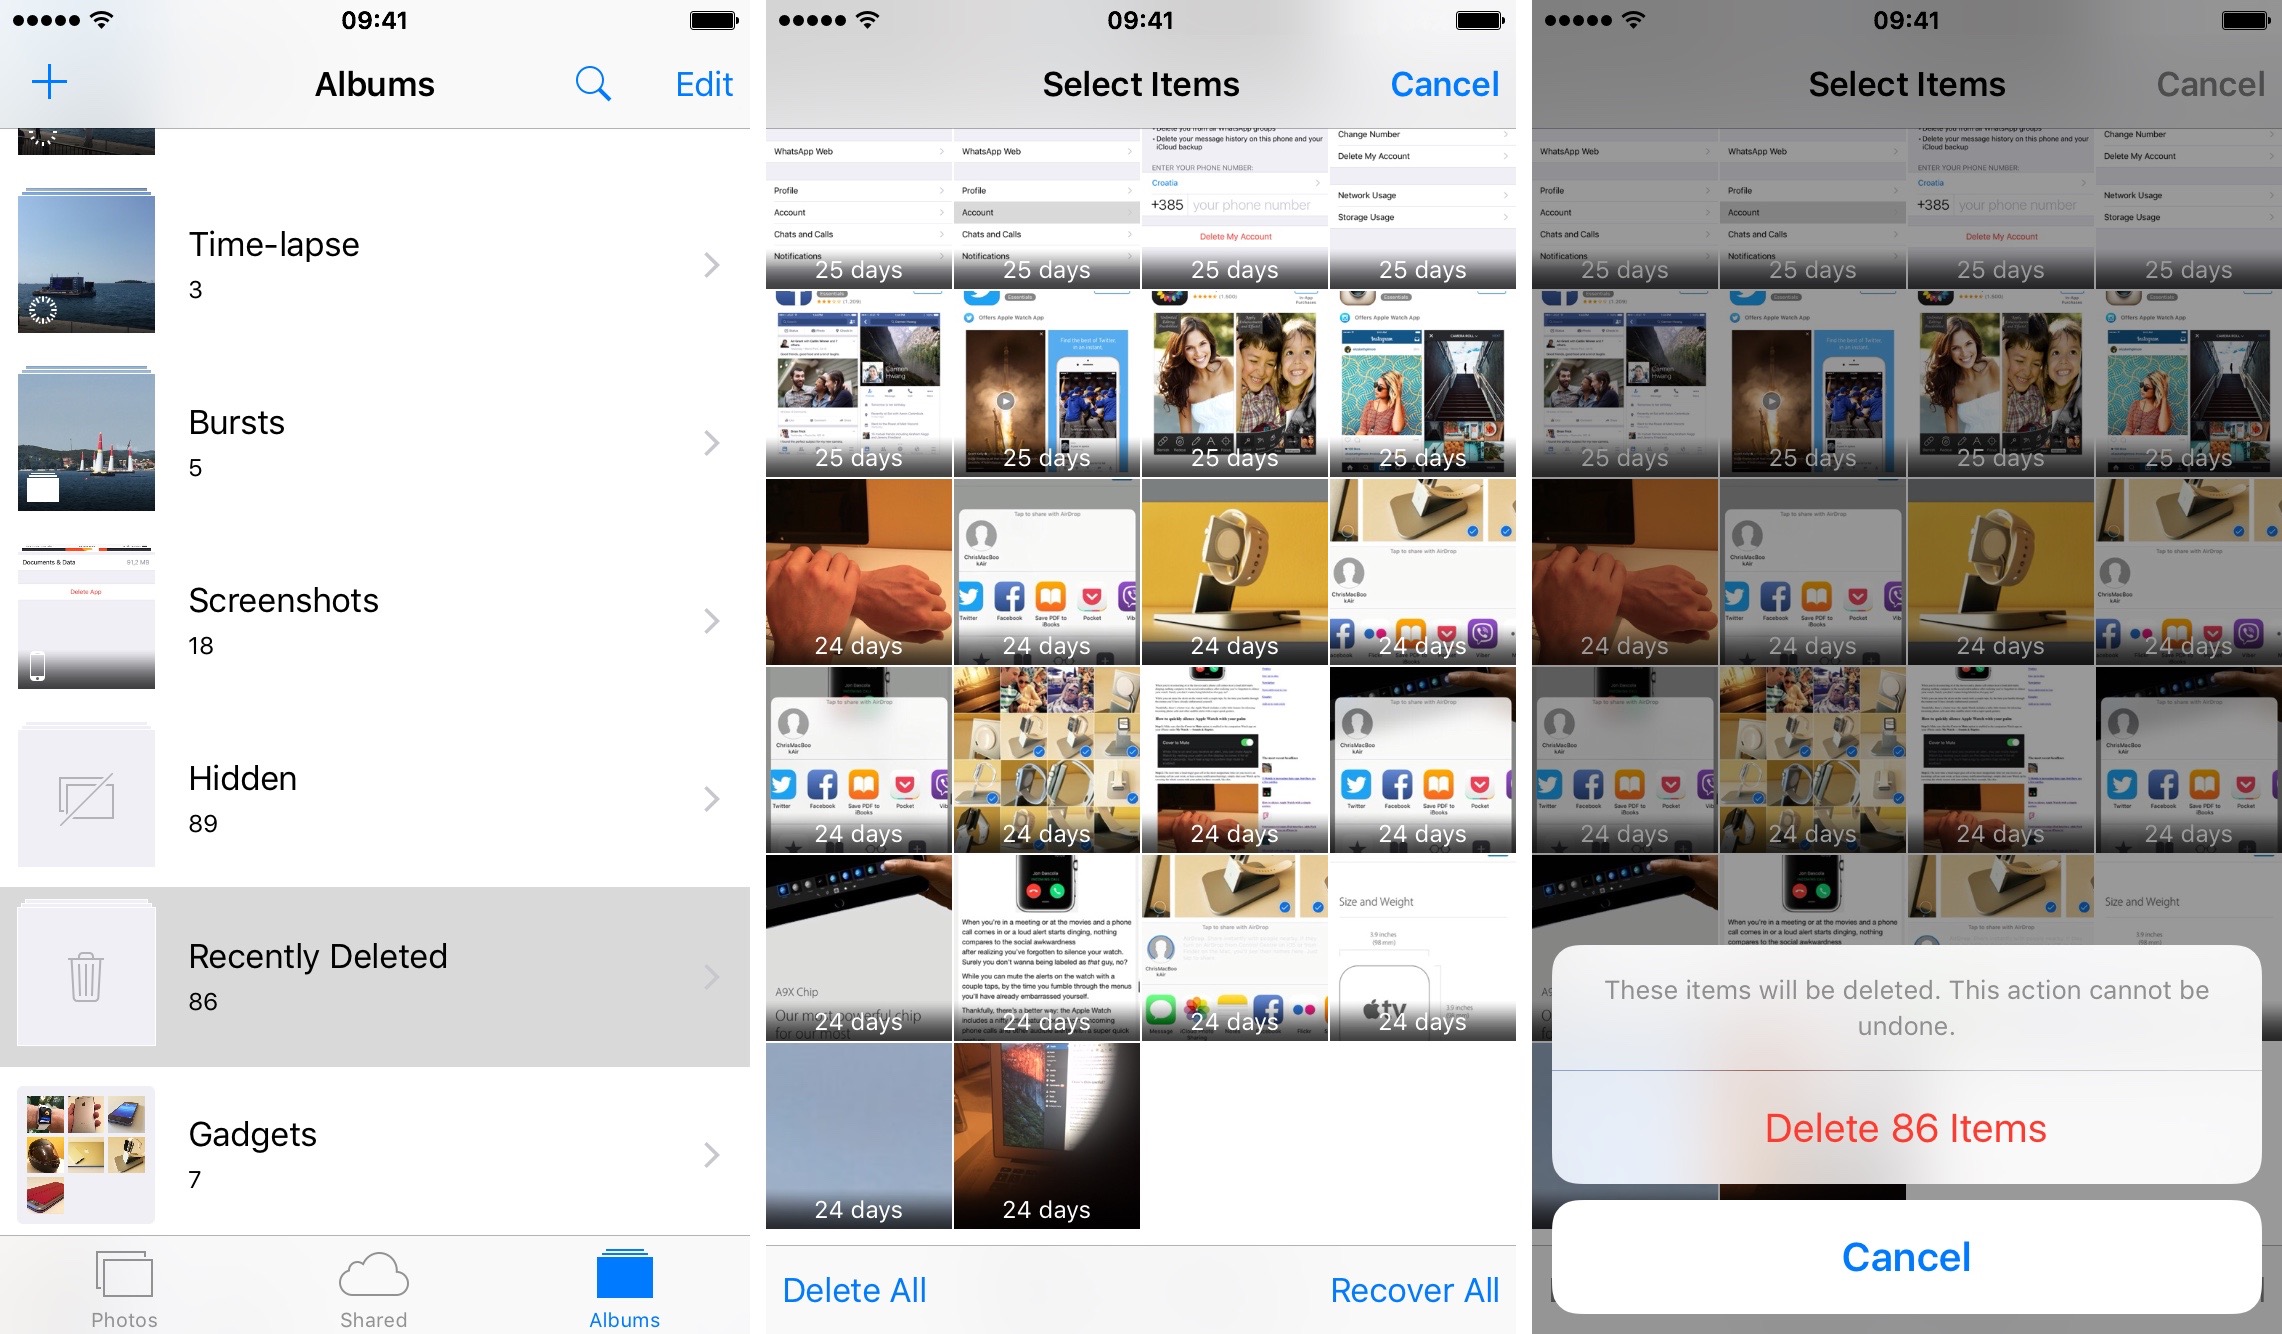
Clearing out the Recently Deleted albums in Photos, converting some Live Photos into stills and limiting video capture to 1080p instead of 4K are sound advices, too.
To clear out Siri’s cache, disable and re-enable the feature in Settings. It might as well be a good idea to disable unwanted apps in Spotlight in order to keep the size of iOS’s search index under control. Oh, and do sync your device with iTunes (I know, don’t start) on a regular basis: doing so will transfer CrashReporter logs to your computer and delete them from the device.
As a last resort, switch off items you really don’t need in Settings → iCloud.
Moreover, disable iOS features such as third-party keyboards, delete your custom keyboard shortcuts, remove email apps you no longer use and trash the photos in apps like Camera+ and VSCO that by default store images in their own Documents folder.
iOS and smarter storage management
iOS 9 itself incorporates interesting new techniques designed to optimize storage use. For instance, apps compatible with iOS 9’s new App Thinning technique only download assets and code tailored to your specific device.
And some apps and games, including those designed for the new Apple TV, retrieve assets and resources on-demand to further trim down storage consumption.

And should you run out of storage, iOS might offer to temporarily delete some apps and data, and automatically restore them after an iOS update is successfully deployed.
Recommended tutorials
To help you manage your iOS device storage like a pro, we’ve compiled the following list of tutorials that should come in handy:
- How to clear Safari for iOS’s Offline Reading List cache
- How to remove videos from Videos app
- How to remove books from iBooks app
- How to remove photos form Photos app
- How to delete iOS dictionaries
- How to remove software update downloads from iOS
- How to check how much storage space apps are taking up on Apple TV
- New jailbreak tweak lets you clear app caches like a pro
- PhoneExpander for Mac lets you reclaim ‘Other’ storage on iOS device
- How to remove a phone number from iMessage